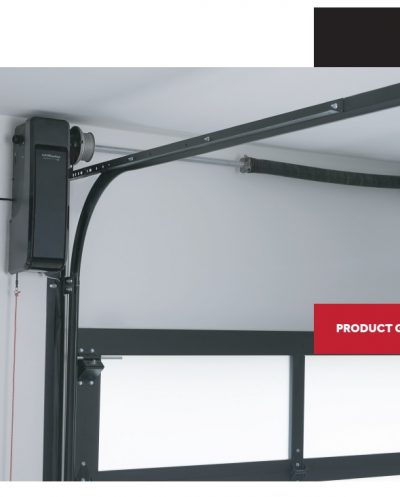
The overall length of a garage door opener is your door height plus three feet and requires a minimum of 2 1/2″ above the highest point of door travel. A LiftMaster residential jack shaft operator does not require any back room and can be installed with only 12″ of side room.

How To Videos

1. How to Program LiftMaster’s 890MAX, 893MAX and 895MAX Remote Controls to a Garage Door Opener
2. How to Change the Battery in Your Remote Control

3. Why isn’t my Keyless Entry Working?
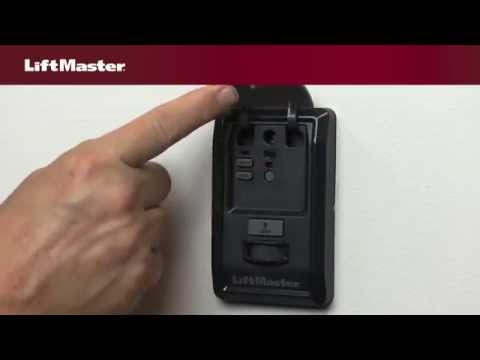
4. How to Program the Model 877LM Wireless Keyless Entry
5. How to Change the Battery in Your Wireless Keyless Entry
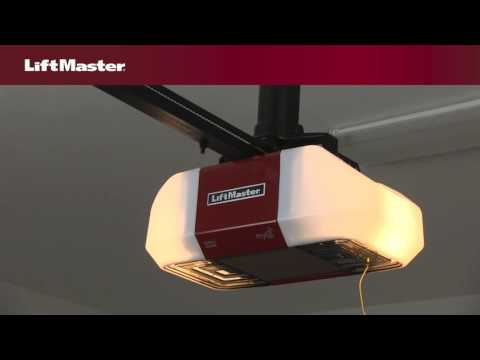
6. How to Disconnect your Door from the Opener
7. Using Smart Control Panel® to Change Lock Settings
8. How to Erase the Memory of your Garage Door Opener
9. Why is my Garage Door Opener Beeping?
10. Why is my Light Blinking and my Remote Control not Working?

11. Why are the Lights on my Garage Door Opener Staying On?
12. How to Turn off the Light Feature Using Smart Control Panel®
13. Why Won’t my Garage Door Close?
14. Why Won’t my Garage Door Open Fully?

15. How to Program Travel on LiftMaster® Security+2.0™ Garage Door Opener

16. How to Align the Safety Reversing Sensors on Your Garage Door Opener
17. How to Code Your Allstar Garage Door Keypad

18. How to Code a Marantec or Broten Garage Door Keypad
19. How to Program a Marantec Universal Receiver
20. How to Code Your Broten Garage Door Multi Code Keypad
21. How to Program LiftMaster's Universal Remote Control Model 375UT to a Garage Door Opener
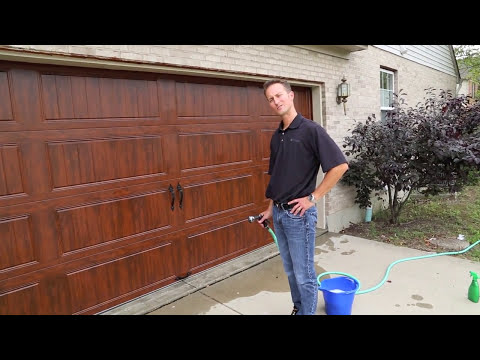
22. How to Wash Your Clopay Garage Door
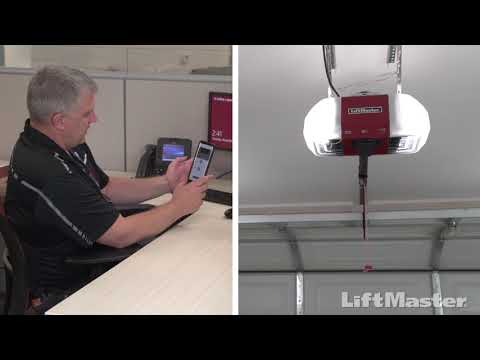
23. How to Set up Your LiftMaster Secure View Belt Drive Wi-Fi Garage Door Opener in the myQ App
General FAQs
- How To Connect Your WiFi Garage Door Opener.
- How to Program Your Homelink Garage Door Opener Control.
- I Need to Replace a Remote.
- How Much Room Inside the Garage Do I Need to Install a Garage Door Opener?
- Do I Have to Install the Safety Sensors or Photo Cells?
- How Do I Get Into My Garage When There is a Power Failure?
- Will My Old Remote Control Work With the New Opener?
- How Do I Add, Program, or Change a LiftMaster Keyless Entry Pin?
- How Do I Program My LiftMaster Remote Control?
- Why Do the Lights on My Garage Door Opener Flash and My Door Will Not Close?
- How Do I Test or Troubleshoot the Safety Reversing Sensors?
- How Do I Align My Safety Reversing Sensors?
- What's My LiftMaster Remote Compatibility?
- How Do I Erase the Remote Control From the LiftMaster Garage Door Opener's Memory?
- Why is My LiftMaster Garage Door Opener Beeping?
- How Do I Find My Learn Button on My Garage Door Opener?
How To Connect Your WiFi Garage Door Opener.
How to Program Your Homelink Garage Door Opener Control.
Looking for help on setting up your HomeLink garage door opener control?
Check out this helpful resource from LiftMaster – Garage Door Homelink Help
I Need to Replace a Remote.
Replacing a garage door opener is a common issue, and programming a remote control is easy. Please look at one of the scenarios below for the best solution to your situation:
- My remote control was lost or stolen.
- I purchased an additional remote control and just need to program it to my opener.
If your remote control has been lost or stolen, a person will have unabated access to your garage. You should erase all existing remote controls out of your receiver. See section below for LiftMaster. See your owner’s manual for other brands.
How Much Room Inside the Garage Do I Need to Install a Garage Door Opener?
Do I Have to Install the Safety Sensors or Photo Cells?
YES, they MUST be installed. The operator will not attempt to close the door if the beams are not installed. Due to federal regulations under UL325, there is no way to bypass or eliminate them. All residential garage door openers manufactured after 1993 are required to meet UL325.
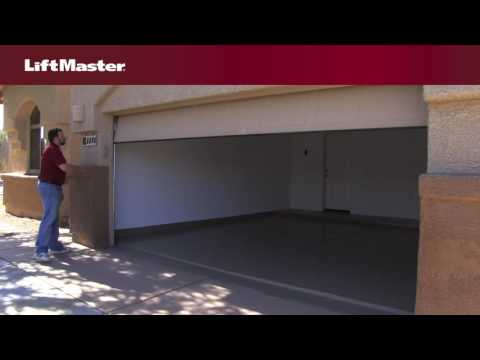
How Do I Get Into My Garage When There is a Power Failure?
If you purchased a battery backup unit, your opener will function normally even in a power outage.
If not, then:
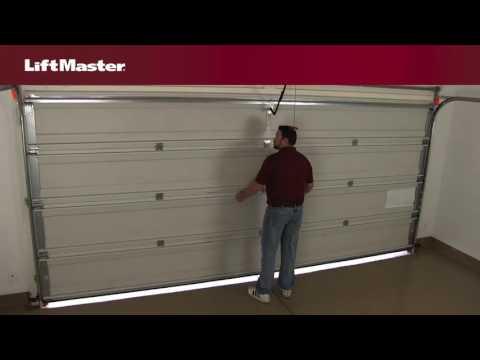
How can I disconnect the garage door opener so I can manually open or close my garage door?
Pulling the emergency release handle disconnects the garage door from the garage door opener. This action allows you to open and close the door manually. The emergency release handle is located at the end of a red rope that hangs from the garage door opener rail near the top of the garage door.
Note: If you are using a residential jackshaft opener, the emergency release handle will be located at the bottom of the motor unit.
WARNING: To prevent possible SERIOUS INJURY or DEATH from a falling garage door:
- If possible, use emergency release handle to disengage trolley ONLY when garage door is CLOSED. Weak or broken springs or unbalanced door could result in an open door falling rapidly and/or unexpectedly.
- NEVER use the emergency release handle unless garage doorway is clear of persons or obstructions.
- NEVER use the handle to pull door open or closed. If rope knot becomes untied, you could fall.
To disconnect the door from the opener
For an opener with a square rail: Pull down on the emergency release handle so that the trolley release arm snaps into the vertical position. This locks out the trolley so the door can be raised and lowered manually as often as necessary.
For openers with a T-rail: Pull the red rope straight down. If you want to lock out the trolley, you need to pull the rope straight down and then pull it back towards the opener. This will allow you to raise and lower the door manually as often as necessary.
For the residential jackshaft opener: Disengage the door lock, door should be fully closed. Pull down on the emergency release handle until you hear a click and lift the door manually.
To reconnect the door to the opener
For an opener with a square rail: Pull the emergency release handle back toward the opener at an angle so that the trolley release arm is horizontal. The trolley will reconnect with the next operation, either manually or by activating the door.
For openers with a T-rail: Pull the handle straight down. The trolley will reconnect the next time the door is activated.
For the residential jackshaft opener: Pull the emergency release handle straight down a second time until you hear a click. The door will reconnect on the next up or down operation.
Will My Old Remote Control Work With the New Opener?
No. Remotes are brand specific, so you will need new remotes with your new system. If you need assistance, please contact us.
How Do I Add, Program, or Change a LiftMaster Keyless Entry Pin?
Your keyless entry can be programmed to activate many devices, including garage door openers and commercial door openers.
Program using the Learn Button
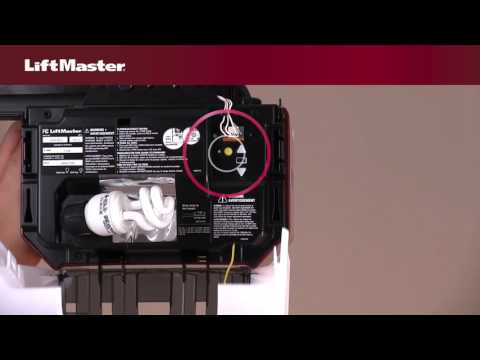
- Locate the Learn button.
- Garage door opener: Located on the same side the antenna hangs from (you may have to remove the light lens). The Learn button may be green, orange, red, purple or yellow with a small LED next to it.
- myQ® Control Panel: Lift the push bar and locate the Learn button.
- Press and release the Learn button.
- If you have a myQ® Control Panel, press the Learn button twice.
Note: The 8500/8500C has a myQ® Control Panel.
- If you have a myQ® Control Panel, press the Learn button twice.
- Within 30 seconds, enter a 4-digit Personal Identification Number (PIN) on the keypad and press ENTER. The LED indicator light will turn off or the operator lights will blink indicating programming was completed successfully.
- Wait 10 seconds to test out your PIN. To test, enter your 4 digit PIN and then ENTER. The operator or opener should activate. If not, repeat steps 2 and 3.
Program a garage door opener using the Multi-Function Door Control
NOTE: This method requires two people if the Keyless Entry is already mounted outside the garage.
- Enter a 4-digit PIN of your choice on the keypad, then press and hold ENTER.
- While holding the ENTER button, press and hold the LIGHT button on the Multi-Function Door Control.
- Continue holding the ENTER and LIGHT buttons while you press the push bar on the Multi-Function Door Control. Note: All three buttons should be held.
- Release the buttons when the motor unit lights blink. This is an indication the programming was done successfully. If light bulbs are not installed, two clicks will be heard.
Change an Existing, Known PIN
If the existing PIN is known, it may be changed by one person without using a ladder.
- Enter the existing 4-digit PIN, then press and hold the # button. The opener lights will blink twice. Release the # button.
- Press the new 4-digit PIN you have chosen, then press ENTER. The motor unit lights will blink once when the new PIN has been changed successfully.
- Wait 10 seconds and test by pressing the new PIN then ENTER. The opener will activate.
Set a Temporary PIN
You may authorize access to visitors or service people with a temporary 4-digit PIN. After a programmed number of hours or number of accesses, this temporary PIN expires and will no longer open the door. It can be used to close the door even after it has expired.
- Press the main 4-digit PIN then press and hold the * button. The opener light will blink three times. Release the button.
Note: Do not use a previous temporary PIN for this step. - Enter a temporary 4-digit PIN, then press ENTER. The opener light will blink four times.
- Set a number of hours or times this temporary PIN will work.
- For hours the temporary PIN will work, press a number up to 255 then press *.
- For times the temporary PIN will work, press a number up to 255 then press #.
- The opener light will blink once when the temporary PIN has been programmed successfully.
- Wait 10 seconds then test by pressing the 4-digit temporary PIN and ENTER. The door should move.
Note: If the temporary PIN was set to a certain number of openings, remember that the test has used up one opening. - To clear the temporary PIN, repeat steps 1-3 and set the number of hours or times to 0 in step 3.
Setting up the One Button Close feature
The opener can be closed by pressing only the ENTER button if the one-button close feature has been activated. This feature has been activated at the factory.
To activate or deactivate this feature, press and hold buttons 1 and 9 for 10 seconds.
- The keypad will blink twice when the one button close is active.
- The keypad will blink four times when the one button close is deactivated.
How Do I Program My LiftMaster Remote Control?
To program using the Learn button
- Locate the Learn button.
- Garage door opener: Located on the same side the antenna hangs from, you may have to remove the light lens. The Learn button may be green, orange, red, purple or yellow with a small LED next to it.
- myQ® Control Panel: Lift the push bar and locate the learn button.
- Press and release the Learn button.
- If you have a myQ® Control Panel, press the Learn button twice.
Note: The 8500/8500C has a myQ® Control Panel.
- If you have a myQ® Control Panel, press the Learn button twice.
- Within 30 seconds, press and hold the desired button on the remote control for three seconds. The LED indicator light will turn off or the operator lights will blink indicating programming was completed successfully.
- Press the remote control again to test out. The operator or opener should activate. If not, repeat steps 2 and 3.
Why Do the Lights on My Garage Door Opener Flash and My Door Will Not Close?
The garage door opener is equipped with two safety features that may prevent the door from closing and cause the lights to flash.
The Lock Button on the Door Control
The lock button on the door control may be activated. Press the button to turn this feature off. The light bulb will blink two times. This feature is designed to prompt you that the lock button is activated. When the lock button is ON the garage door opener will work from the door control but the remote controls are locked out.
The Safety Reversing Sensors
The most common reason for the lights to flash on the garage door opener and the door not closing is that the safety reversing sensors are misaligned or obstructed; this is a safety feature of the garage door opener.
When properly connected and aligned, the sensor will detect an obstacle in the path of its electronic beam. If an obstruction breaks the light beam while the door is closing, the door will stop and reverse to full open position, and the opener lights will flash 10 times.
Your garage door opener is equipped with a Self Diagnostic feature to help you determine what the issue is. Based on the model of your garage door opener, your garage door opener will flash an LED next to your learn button or flash the Up and Down arrows a number of times to indicate the issue. Use the table below to diagnose and resolve the issue.
| LED | Up and Down Arrow | Symptom | Answer |
| 1 | 1 Up 1 Down | Wires are cut, or not connected | How do I test or troubleshoot the safety sensor wires? |
| 2 | 1 Up 2 Down | Wires are reversed, or there is a short in the wiring | How do I test or troubleshoot the safety sensor wires? |
| 4 | 1 Up 4 Down | Safety Sensors are misaligned, or were momentarily obstructed | How do I align my safety reversing sensors? |
NOTE: The garage door can be closed by pressing and holding the door control push bar until down travel is completed.
How Do I Test or Troubleshoot the Safety Reversing Sensors?
The safety reversing sensors must be connected and aligned correctly before the garage door opener will move in the down direction. Typically issues with the safety sensor wiring occur because of a poor connection, incorrectly connected wires or a short in the wire from a staple.
NOTE: If you are unable to get the door closed and the safety sensors are the issue, the garage door can be closed by pressing and holding the Door Control push bar until down travel is completed.
If both safety sensor LED lights are not lit
Security+ 2.0 garage door openers have an energy conservation feature. If the garage door opener is Security+ 2.0, activate the door to determine if the opener was only in sleep mode.
Inspect the wiring
- Check for incorrect wiring between the sensors and the garage door opener.
- Verify the wire connections are correct on the garage door opener. The solid white wires connect (insert) to the white terminal (2) and the white/black wires connect to the grey terminal (3).
NOTE: The amber LED on the sending sensor will glow regardless of alignment or obstruction. If the green LED on the receiving sensor is off, dim or flickering (and the invisible light beam path is not obstructed), alignment is required. See How do I align my safety reversing sensors?
Test the safety sensor wires
- Remove the sensors from the brackets.
- Remove the wires from the wire nuts or cut the sensor wires 12″ from the sensors.
- Strip both ends of wires from each sensor and twist like colored wires together. Proceed with both sensors to the garage door opener motor unit.
- Remove existing wires from the white and grey terminals on the back of the operator.
- Attach or insert white wires into the white terminal and black/white striped wires into the grey terminal.
- Point the sensors at each other. If both sensor LEDs turn on, there is an issue with your wiring. Replace the wires between the opener and the sensors. If the LEDs DO NOT turn on, replace the sensors.
Note: If after replacing the sensors, the LED’s still do not light, replace the logic board.
How Do I Align My Safety Reversing Sensors?
The LEDs on both the sending and receiving sensors will glow steadily when the wiring connections and alignment are correct. The amber LED on the sending sensor will glow regardless of alignment or obstruction. If the green LED on the receiving sensor is off, dim, or flickering (and the invisible light beam path is not obstructed), alignment is required.
Note: On the older safety sensors, both LED lights are green. The receiving sensor is the one where the green light goes out when you pass your hand in front of the sensor. The sending sensor stays solid.
- Remove the receiving sensor (green LED) from bracket. You can do so by taking off the wing nut.
- Point the sensor away from the sending sensor so that the LED light is completely off.
- Once the LED light is off, wait 10 seconds.
- Slowly rotate sensor back until it lights again. When you have a strong green light, put it back into the bracket and put the wing nut back on.
NOTE: If you are unable to get the door closed and the safety sensors are the issue, the garage door can be closed by pressing and holding the door control push bar until down travel is completed.
What's My LiftMaster Remote Compatibility?
Find your garage door opener’s Learn Button to determine what model of remote control is compatible. The Learn Button is located on either the back or the right side of the opener, near the hanging antenna wire.
If you are using the myQ® Control Panel G888LM please follow the programming instructions located: LiftMaster Model 888LM myQ® Control Panel Instructions
| Remote Control | Keyless Entry | myQ® Accessories |
| 891LM (One-Button Remote) | 877LM | 823LM Remote Light Switch |
| 893LM (Three-Button Remote) | 878MAX | 825LM Remote Light Control |
| 893MAX (Three-Button Remote) | 828LM Internet Gateway | |
| 890MAX (Mini-Keyring Remote) | 829LM Garage Door Monitor | |
| 895MAX (Three-Button Remote) | ||
| 892LT (Two-Button Learning Remote) | ||
| 894LT (Four-Button Learning Remote) | ||
| 885LM Wireless Door Control |
If your garage door opener has a Yellow Learn Button, it utilizes Security+ 2.0 technology. Use the chart below to find your remote or keyless entry’s model number.
| Learn Button | Compatible Remote Controls | Compatible Keyless Entry |
| 891LM (One-Button Remote) | 877LM | |
| 893LM (Three-Button Remote) | 878MAX | |
| 893MAX (Three-Button Remote) | ||
| 890MAX (Mini-Keyring Remote) | ||
| 895MAX (Three-Button Remote) | ||
| 892LT (Two-Button Learning Remote) | ||
| 894LT (Four-Button Learning Remote) |
If your garage door opener has a Purple Learn Button, it utilizes Security+ 315Mhz technology. You will see a ((())) symbol on all of your remote devices. Use the chart below to find your remote or keyless entry’s model number.
| Learn Button | Compatible Remote Controls | Compatible Keyless Entry | |
| 371LM (One-Button Remote) | 377LM | ||
| 372LM (Two-Button Learning Remote)* | 379LM-10 (Fingerprint Keyless Entry) | ||
| 373LM (Three-Button Remote) | 878MAX | ||
| 374LM (Four-Button Learning Remote)* | |||
| 370LM (Mini-Keyring Remote) | |||
| 373P (Premium Three-Button Remote) | |||
892LT (Two-Button Learning Remote)* |
|||
| 894LT (Four-Button Learning Remote)* |
*The 892LT and 894LT are replacements for models 372LM and 374LM.
If your garage door opener has a Red or Orange Learn Button, it utilizes Security+ 390Mhz Rolling Code technology. Use the chart below to find your remote or keyless entry’s model number.
| Learn Button | Compatible Remote Controls | Compatible Keyless Entry | |
| 971LM (One-Button Remote) | 878MAX | ||
| 894LT (Four-Button Learning Remote)* | |||
*The 892LT and 894LT are replacements for models 972LM and 974LM.
If your garage door opener has a Green Learn Button, it utilizes Billion Code technology. Use the chart below to find your remote or keyless entry’s model number.
| Learn Button | Compatible Remote Controls | Compatible Keyless Entry | ||
| 81LM (One-Button Remote) | 878MAX | |||
| 82LM (Two-Button Remote) | ||||
| 83LM (Three-Button Remote) | ||||
84LM (Four-Button Remote)
|
||||
How Do I Erase the Remote Control From the LiftMaster Garage Door Opener's Memory?
There are a few instances that the memory of your opener would need to be erased.
- An unwanted remote is activating your garage door opener
- One remote button is activating multiple doors
- Your remote control is lost or has been stolen
- Purchased a new home and want to set garage door opener back to factory default
NOTE: Erasing the memory will remove ALL remote controls and keyless entry codes from the garage door opener.
Begin by locating the LEARN button on the back or side of the motor unit; generally this is on the same side as the antenna wire. You may need to remove a light lens cover or open a control panel to gain access. The LEARN button may be green, orange, red, purple or yellow, and will have a small LED next to it.
Note: Erasing the memory on your opener will clear out any working remotes or keyless entries. You will need to reprogram them.
Erase all remote controls and keyless entries
Units with a green, orange, red, purple or yellow LEARN button:
- Press and hold the LEARN button on the garage door opener until the LED next to the button goes out (approximately 6 seconds). All remote controls and keypads have been erased.
Erase all remote controls, keyless entries and myQ® devices from the garage door opener
- Press and hold the LEARN button on garage door opener until the Learn LED goes out (approximately 6 seconds).
- Immediately press and hold the LEARN button again until the Learn LED goes out. All codes are now erased. Reprogram any accessory you wish to use.
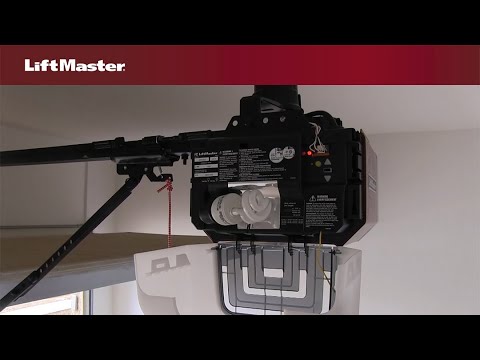
Why is My LiftMaster Garage Door Opener Beeping?
Premium LiftMaster garage door openers featuring a battery backup and/or Wi-Fi connectivity have a buzzer alert that makes a beeping sound. You will hear a beep to confirm a step is performed successfully or you will hear a beep to diagnose an issue. The number of beeps heard will depend on the type of garage door opener and the function you are performing on the garage door opener.
If you have a garage door opener with a battery backup and it is…
- Beeping every 2 seconds
- This means the unit is operating under battery power. The battery LED will display solid orange.
- Ensure the power is restored throughout the house. If power is restored but the LED is still orange, then test the electrical outlet by plugging in a different device.
- Beeping every 30 seconds
- If the battery LED is flashing orange it means the battery is low.
- Test the electrical outlet by plugging in a different device. If there is power and the LED does not change to a flashing green, then replace the battery.
- Beeping every 30 seconds
- If the battery LED is solid red, then the battery is dead and cannot recharge.
- Replace the battery.
Note: To temporarily stop the beeping while waiting on a new battery, unplug the unit and disconnect the battery. After disconnecting the battery, plug the unit back and the beeping will stop.
Useful information about the backup battery
The battery is designed to run 20 full cycles on a full charge, which equates to about 1 -2 days of normal operation. If the power is not restored by this time, the battery needs to be unplugged from the motor. If you do not disconnect the battery, it will drain too low and will not recharge. The battery would then need to be replaced.
- It is a 12-volt rechargeable battery with 4.5 AH (amp hours).
- The weight of the battery is 4.5 lbs.
- The backup battery is an accessory and has a one-year warranty from the date of purchase.
If your garage door opener has Sec+2.0
- You will hear 1 beep when the garage door opener is placed into limit and force Learn mode. You will also hear 1 beep when pressing the up and down arrows.
- Constant beeping indicates the door is closing unattendedly.
- Garage door openers using a timer-to-close control panel will beep for 8 seconds before an open garage door closes. It will continue to beep until the door is closed.
If your garage door opener has Wi-Fi
In addition to the beeps heard from the Sec+2.0 garage door openers, the Wi-Fi Garage Door Opener will also beep under the following condition:
- 1 beep: When GDO is placed into Wi-Fi Mode
- 1 continuous beep: While in Wi-Fi mode, the GDO is attempting to connect to router
- 2 beeps: While in Wi-Fi mode, the GDO is attempting to connect to myQ® Server
- 3 slow beeps: While in Wi-Fi mode, the GDO connects to network
- 6 fast beeps: While in Wi-Fi mode, the GDO fails to connect to server
- 3 fast beeps: Confirmation of Erase of Wi-Fi from GDO
How Do I Find My Learn Button on My Garage Door Opener?
The Learn button on your garage door opener is located above the antenna wire that hangs from the motor head or it may also be under a light cover. The Learn button will be either green, red/orange, purple or yellow.
The Learn button has two functions: One is to program accessories to the opener; the other is the clear the memory of the opener. Clearing the memory on a unit will erase all of the accessories that are programmed to the opener.
If your system has a green, red/orange or purple Learn button
To program the remote:
- Press and release the Learn button, the light will come on steady for 30 seconds.
To clear the memory:
- Press and hold the Learn button. The LED will turn on. After 6 seconds the LED will turn off which will clear out the handheld remote controls and keyless entry.
If your system has a yellow Learn button:
To program the remote:
- Press and release the Learn button. The light will come on steady up to 2 minutes.
To clear the memory: This action must be completed two times to remove myQ® accessories and door controls.
- Press and hold the Learn button. The LED will turn on. After 6 seconds the LED will turn off which will clear out only the handheld remote controls and keyless entry.
- Within 3 seconds of the LED turning off, press and hold the Learn button for 6 seconds. When the LED turns off a 2nd time, the myQ® accessories and door controls will be removed from the garage door opener.
- Reprogram devices if necessary.
Manuals & Brochures

Garage Door

Windcode Brochure

Canyon Ridge® Collection Product Brochure

Eden Coast Product Brochure
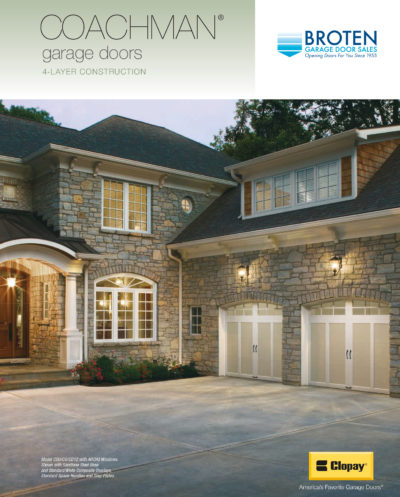
Coachman® Product Brochure

Gallery® Collection Product Brochure

Ultra-Grain Finish Options

Modern Steel™ Product Brochure

Premium Series Product Brochure
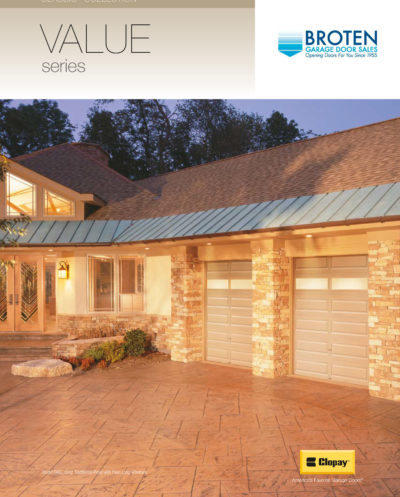
Value Series Product Brochure
Garage Door Care and Maintenance
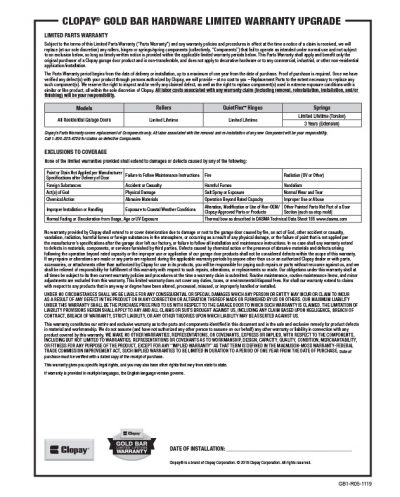
Gold Bar Warranty

Canyon Ridge® Collection Care and Maintenance Manual
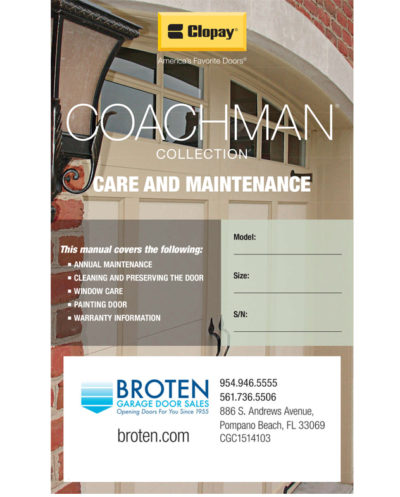
Coachman® Care and Maintenance Manual

Gallery® Collection Care and Maintenance Manual

Modern Steel™ Care and Maintenance Manual

Premium Series Care and Maintenance Manual

Value Series Care and Maintenance Manual
Residential Openers
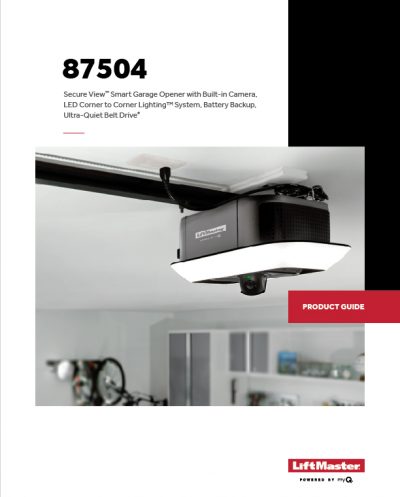
87504 Secure View Smart Garage Door Opener
84505 Secure View Smart Garage Door Opener

87802 Heavy Duty Garage Door Opener
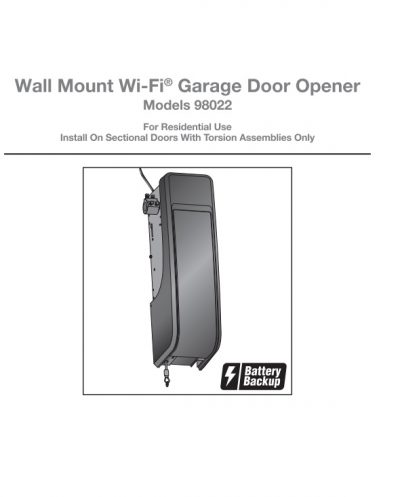
Elite Series® 98022 – Residential Jackshaft Garage Door Opener
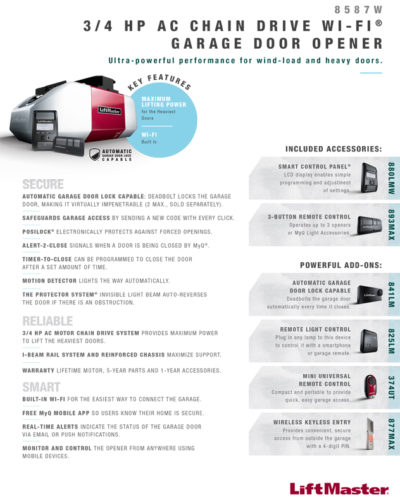
8587W Product Brochure
Residential Opener Manuals
Commercial Overhead Doors


Learn More About Garage Door Solutions
View all Posts
How to Check the Balance of Your Garage Door
Posted on: September 11, 2017A garage door includes springs that make it simple and easy to raise and lower it. Your garage door must be perfectly balanced so it can stay open when it needs to and shut safely and gently when the situation calls for it. Balance is essential to your garage door’s proper and safe functionality. But […]
Common Garage Door Problems: DIY or Call a Professional?
Posted on: May 9, 2017You probably don’t think of your garage door as a complicated piece of equipment. Its job is to look good on the front of your garage, keep cold air and thieves out and provide ventilation and access when you want to let the outdoors in. Today’s doors are a fair bit more complex than the […]
Common Garage Door Noises Every Homeowner Should Know
Posted on: June 13, 2018Leaving for work one morning, you notice your garage door making a strange new noise — maybe a grinding sound or squeak as it opens or closes. Your garage door may still open and close as needed, but many homeowners make the mistake of not asking what unfamiliar sounds could indicate. Eventually, your garage door […]